Rust Qt Binding Generator lets you combine Rust code with a Qt1 graphical application. A previous blog shows how to make a simple clock. It’s a good idea to read that post before reading this more advanced post, because in this post we are getting serious.
This blog post shows how to write a to-do application. The data model
is a list of to-do items. The source code for this example is available
in the folder examples/todos
in the Rust
Qt Binding Generator repository.
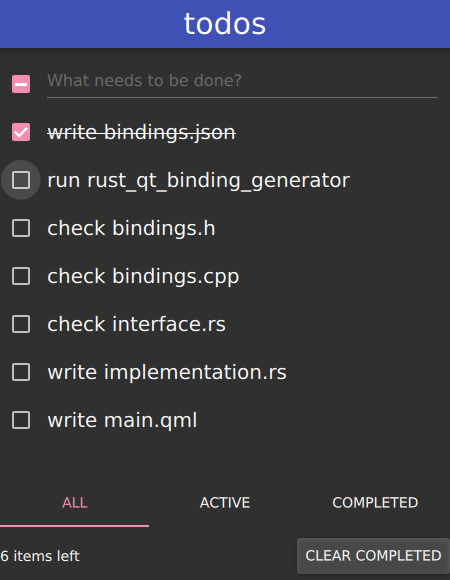
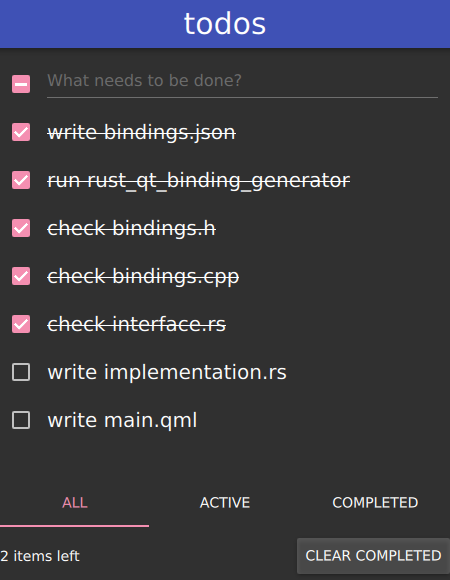
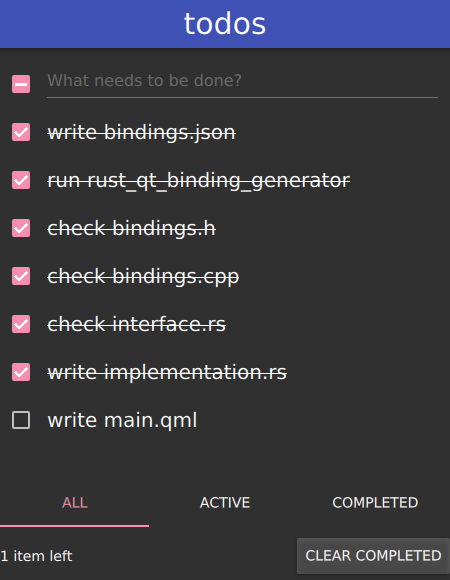
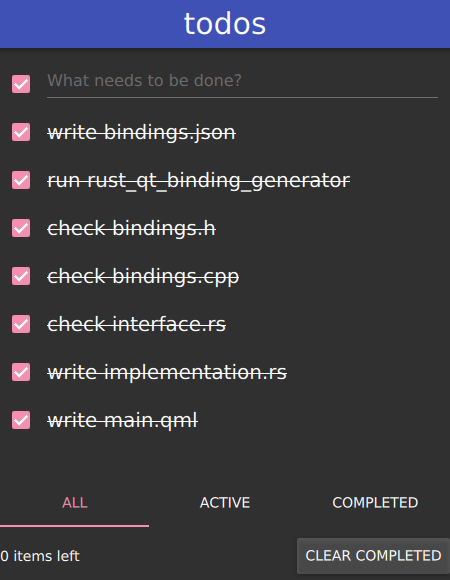
Here is a screenshot of the finished application. The to-do application shows the steps to implement the to-do application. This application was the subject of a presentation on Rust Qt Binding Generator.

Model/View programming
Model/View programming is a big thing in Qt. It’s everywhere. It’s not trivial, but powerful. Please bear with me for a bit as we’ll talk about how this works. Rust Qt Binding Generator does most of the hard work for you, but it does not hurt to know a bit of how it does this.
One C++ class is the basis for all the model/view programming in Qt: QAbstractItemModel. As the name says, QAbstractItemModel is an abstract model for items. If you want to have a list, a tree or a table in your program, you’ll be deriving a class from QAbstractItemModel.
When your data is in a class derived from QAbstractItemModel, you can put that model in one or more simultaneous widgets. In Qt, you put a list in QListView, a tree in a QTreeView, and a table in a QTableView. QComboBox and QComplete also use a model for their data.
In QML, models are even more important. QML has a ListView, TreeView, and TableView as well, but also GridView, Repeater, MapItemView and more.
Any non-trivial application will have Qt models. So we’ll show you how to make a list model with Rust Qt Binding Generator.
A to-do application
The to-do application in this post implements the specification of the TodoMVC website. ‘MVC’ stands for Model-View-Controller. In this post, Rust supplies the Model. The View and Controller are written in QML. The to-do list above contains seven items. The three items that start with ‘check’ are there for the curious that would like to see what code for the communication between Rust and C++ looks like.
The first step in the to-do is ‘Write bindings.json’. bindings.json
is the file where you describe the model of your application. The data
in the to-do application is simple. It is a list of to-do items. So we
define an object of type List. Each list item has two
properties: a boolean completed and a QString
description. You can see these fields in the JSON snippet
below.
Both fields, completed and description are
writable so the to-do can be toggled and the description text can be
changed.
    ...
    "objects": {
        "Todos": {
            "type": "List",
            ...
            "itemProperties": {
                "completed": {
                    "type": "bool",
                    "write": true
                },
                "description": {
                    "type": "QString",
                    "write": true
                }
            },
            "functions": {
                "add": {
                    "return": "void",
                    "mut": true,
                    "arguments": [{
                        "name": "description",
                        "type": "QString"
                    }]
                },
                ...
The field functions adds a function called
add. It describes a Rust function for adding a to-do item.
This function will be visible the the QML code.
Rust Qt Binding Generator creates three files from
bindings.json with this command:
rust_qt_binding_generator bindings.jsonThe created files are Bindings.h,
Bindings.cpp,
and interface.rs.

The Rust side
The generated file interface.rs contains a Rust trait
that is derived from the data model. Here is the relevant part of the
Rust trait:
pub trait TodosTrait {
    fn new(emit: TodosEmitter, model: TodosList) -> Self;
    fn emit(&self) -> &TodosEmitter;

    fn row_count(&self) -> usize;
    fn insert_rows(&mut self, _row: usize, _count: usize) -> bool { false }
    fn remove_rows(&mut self, _row: usize, _count: usize) -> bool { false }

    fn completed(&self, index: usize) -> bool;
    fn set_completed(&mut self, index: usize, bool) -> bool;
    fn description(&self, index: usize) -> &str;
    fn set_description(&mut self, index: usize, String) -> bool;
}
It is up to you to implement this trait in your code in a module
implementation in a file called
implementation.rs. (You can set a different name in
bindings.json.) If implementation.rs does not
yet exist, an initial version will be generated for you.
There’s quite a few functions that require implementing. Let’s go through them one by one. But first let’s write two structs that will hold our data.
#[derive(Default, Clone)]
struct TodosItem {
    completed: bool,
    description: String,
}

pub struct Todos {
    emit: TodosEmitter,
    model: TodosList,
    list: Vec<TodosItem>,
}

impl TodosTrait for Todos {
    ...
}
The struct Todos contains our to-do items in a
Vec<TodosItem>. In addition, there are two members: a
TodosEmitter called emit and a
TodosList called model. These are used to
communicate with the user interface. Whenever there is a change in our
model, we call a function in either the TodosEmitter or the TodosList.
In the previous blog post we already saw an emitter. It was used to emit
a signal whenever the current time, an object property, changed. The
model is new. It is present in list models and tree models. It is used
to signal changes in the items in list and tree models.
Let’s get to the implementation of our trait.
new
new is the factory function that is called when the user
interface creates a new instance of TodosTrait.
    fn new(emit: TodosEmitter, model: TodosList) -> Todos {
        Todos {
            emit: emit,
            model: model,
            list: vec![TodosItem::default(); 0],
        }
    }
emit
For some functions in the binding, such as for the destruction of the
model, signals must be emitted. The function emit gives the
binding code access to the emitter. The implementation is straight
forward.
    fn emit(&self) -> &TodosEmitter {
        &self.emit
    }
row_count
Things are getting a bit more interesting. The user interface needs
to know how many items are in the list. row_count reports
this number. We simply return the length of the
Vec<TodosItem>
    fn row_count(&self) -> usize {
        self.list.len()
    }
insert_rows and remove_rows
A to-do list is not very useful if you cannot add items. The trait
functions insert_rows and remove_rows are
called when the user wants to add or remove items. These functions
receive two arguments. row is the index of the first row
that is being added or removed. count is the number of rows
that are being added.
If row or count do not make sense and no
row can be added, false is returned.
    fn insert_rows(&mut self, row: usize, count: usize) -> bool {
        if count == 0 || row > self.list.len() {
            return false;
        }
        self.model.begin_insert_rows(row, row + count - 1);
        for i in 0..count {
            self.list.insert(row + i, TodosItem::default());
        }
        self.model.end_insert_rows();
        true
    }
    fn remove_rows(&mut self, row: usize, count: usize) -> bool {
        if count == 0 || row + count > self.list.len() {
            return false;
        }
        self.model.begin_remove_rows(row, row + count - 1);
        self.list.drain(row..row + count);
        self.model.end_remove_rows();
        true
    }
This is where we get to see model in action. It is used
before and after the model changes. Before rows are added
begin_insert_rows must be called.
end_insert_rows must be called immediately afterwards. Now
all parts of the user interface that show our to-do list will be
notified of the change.
insert_rows and remove_rows will be called
from the GUI thread. Adding rows to the model can only be done in the
GUI thread. If another thread would receive modifications to the model,
it would have to buffer them and send a signal to the GUI thread to
process the changes. There is an example of this in the Rust Qt Binding
Generator demo application. The Rust type system ensures that these
signals are only sent from the GUI thread.
completed, set_completed, description, and set_description
Our data model is a list of items with two properties each:
completed and description. These correspond to
two accessor functions in the trait. There are also two setters,
set_completed and set_description. All four
functions are called with the index of the item.
    fn completed(&self, index: usize) -> bool {
        self.list[index].completed
    }
    fn set_completed(&mut self, index: usize, v: bool) -> bool {
        self.list[index].completed = v;
        true
    }
    fn description(&self, index: usize) -> &str {
        &self.list[index].description
    }
    fn set_description(&mut self, index: usize, v: String) -> bool {
        self.list[index].description = v;
        true
    }
For these functions, you do not need to inform the user interface.
That is taken care of by the generated binding code. When items are
modified outside of these functions, model.data_changed
should be called to notify the user interface of the change.
add
Besides the standard model functions, we have to implement one more
function. The functions field in bindings.json
described a function called add. This function adds a new
to-do item. The only parameter is a string. A newly inserted to-do item
has not yet been completed, so completed is always
false.
    fn add(&mut self, description: String) {
        let end = self.list.len();
        self.model.begin_insert_rows(end, end);
        self.list.insert(end, TodosItem { completed: false, description });
        self.model.end_insert_rows();
    }
This function also uses model to signal to the GUI that
the model has changed.

The QML side
The QML part of the to-do application consists of one QML file. This file is about 200 lines. Below are some cut down snippets from that file.
At the top, the Rust data model should be imported.
import RustCode 1.0;The data model, Todos is instantiated. It is given an
id, todoModel and populated with some to-do items.
    Todos {
        id: todoModel

        Component.onCompleted: {
            add("write bindings.json")
            add("run rust_qt_binding_generator")
            add("check bindings.h")
            add("check bindings.cpp")
            add("check interface.rs")
            add("write implementation.rs")
            add("write main.qml")
        }
    }
The application contains a text field that creates a new to-do item when a line of text is entered.
    TextField {
        id: input
        Layout.fillWidth: true
        placeholderText: qsTr("What needs to be done?")
        onAccepted: {
            const todo = text.trim()
            if (todo) {
                todoModel.add(todo)
            }
            input.clear()
        }
    }
Each visible item in the to-do list is shown by a
Component. These components are cleverly reused for newly
visible items when scrolling. Each component contains a
CheckBox and Label. The status of the
CheckBox is retrieved from the model with
checked: completed. The text in the Label is
also retrieved from the model: text: description. When the
CheckBox is toggled, the Rust model is changed:
onToggled: todoModel.setCompleted(index, checked).
    Component {
        id: todoDelegate
        RowLayout {
            width: parent.width
            CheckBox {
                checked: completed
                onToggled: todoModel.setCompleted(index, checked)
            }
            Label {
                id: label
                text: description
                anchors.fill: parent
                verticalAlignment: Text.AlignVCenter
                font.strikeout: completed
                font.pixelSize: 20
            }
        }
    }
To show all to-do items, a ListView is added. It is
connected to the model with model: todoModel and to the
delegate with delegate: todoDelegate.
    Flickable {
        anchors.fill: parent
        ListView {
            anchors.fill: parent
            model: todoModel
            delegate: todoDelegate
        }
    }
Concluding
The full application has some more features, but no new concepts. You’re invited to run and study the code. When you master writing models, you can write sophisticated applications in Qt.
A nice example is notquick, a viewer for mail boxes that uses Rust Qt Binding Generator. For more examples with trees and threading, check out the folder demo.
1: pronounced as kjuːt
Comments
Post a comment